How to Setup a Gateway for Cognos 11
A question that we very often get asked is this: “Does the Optional Gateway ever become a requirement?“
And the answer is, “Yes!”
One of the most common scenarios where having an Optional Gateway setup becomes mandatory is having single sign-on (SSO) setup. In this blog post I will cover how to setup an Optional Gateway in Cognos Analytics versions 11.0.2 and 11.0.3. Those who have followed IIS configuration guideline can be found here. And to make this easier, IBM has a small tool you can download here to automate the process.
Server Architecture
IBM Cognos Analytics uses a web-based multi tier server architecture that is made up of three server tiers:
- Web Tier
- Application Tier
- Data Tier
Web communication in IBM Cognos Analytics is typically routed through the Web Tier which facilitates user connections to IBM Cognos analytics applications, and the component responsible for this is IBM Cognos Analytics Gateway.
The IBM Cognos Analytics Gateway component can be installed on a different server from the Content Manager or the Application Tier, and IBM calls this an Optional Gateway installation.
Installing the IIS Application Request Routing (ARR) Extension
I’ll be using IIS 8 (Internet Information Services) for both of the reverse proxy setup methods. But first, you need to make sure that you have the IIS Application Request Routing (ARR) extension installed. This is the extension that allows IIS to function as a reverse proxy.
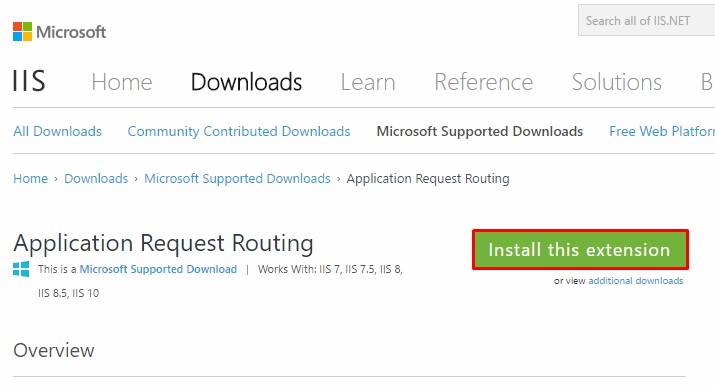
1. In a new browser session, enter the following address: http://www.iis.net/downloads/microsoft/application-request-routing and click the big green “Install this extension” button.
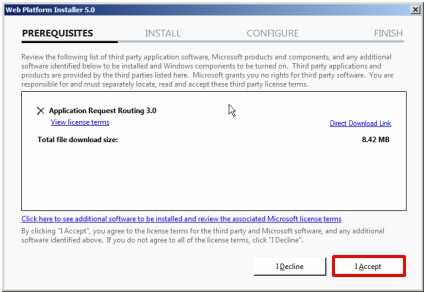
 2. You are then prompted to save a file called “ARRv3_0.exe.” Save it somewhere on your machine, and then run it. Once the installer initiates, press the “I Accept” button, if you accept the terms and conditions.
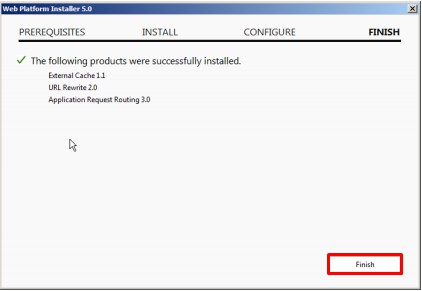
3. The installer will then download and install the ARR extension. When done click on the “Finish” button. If you are shown any other pages, just exit out of all of them.
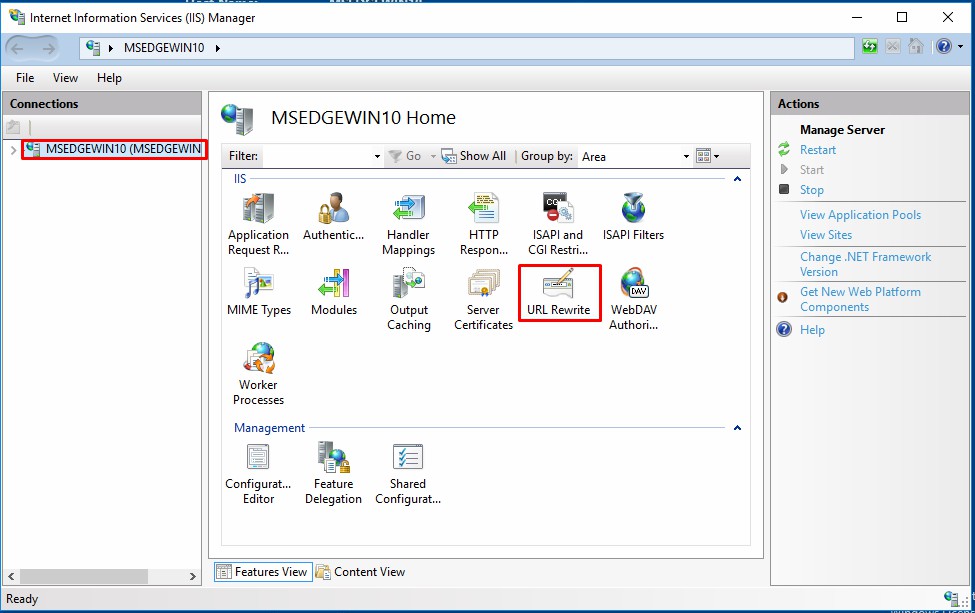
4. To make sure that your extension was installed properly, launch IIS Manager from the “Administrator Tools” in Windows. Once it launches, click on the server name at the top left hand of the screen. Then, within the middle IIS pane, the URL rewrite feature should now be visible.
Now that you have installed the ARR extension, you can proceed with setting up the reverse proxy. For that, all you need to do is to follow one of the methods below, depending on your need. Note: if your ultimate goal is to configure your Cognos Analytics to use SSO then proceed to method 2.
Reverse Proxy Setup
Method 1: IIS and Application Request Routing (ARR) Extension configuration. (Not for SSO)
This method lays out a simple way to setup a reverse proxy on your Optional Gateway server using IIS 8. This method is suitable for users who are just trying to setup an external IBM Cognos Analytics gateway where the web server, similar to Hosti Server that’s available, is publicly available or external to a firewall.
1. Open Internet Information Services (IIS) Manager, if you don’t already have it open. Expand the navigation tree on the left panel. Under “Sites” right click on your web site and select “Add Virtual Directory.” Note: If you don’t have a website setup then just right click on “Default Web Site” under “Sites.”
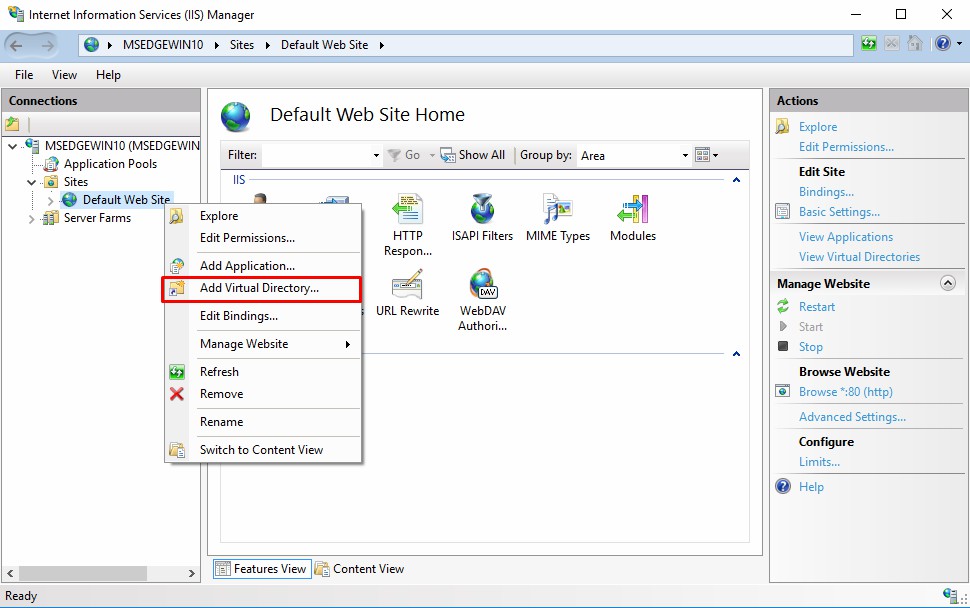
2. Under “Alias” enter any name. I followed what IBM did and just entered “CA11”. Under “Physical path” Navigate to an empty folder that you have created for this purpose anywhere on your system. I again followed IBM and pointed mine to “C:CA”. Don’t worry about the “Test Settings…” or the “Connect as…” button and click on OK. When you expand your website, or in my case the “Default Web Site,” you should see your newly created website as a folder. I see “CA11.”
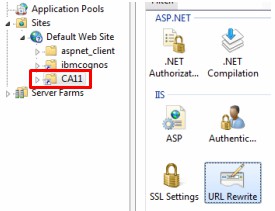
3. Now you need to setup the URL Rewrite which is where you set the reverse proxy to redirect all the web requests from the web tier to the application tier. Click on your new virtual directory on the left panel and then double-click on “URL Rewrite” located in the center.
4. Click on “Add Rule(s)…” located under “Actions” under the right hand panel.
5. Double-click on “Reverse Proxy” under the “Inbound and Outbound Rules” section.
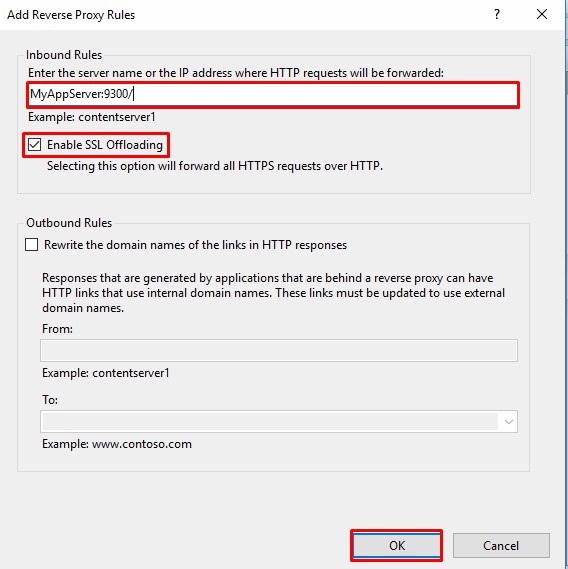
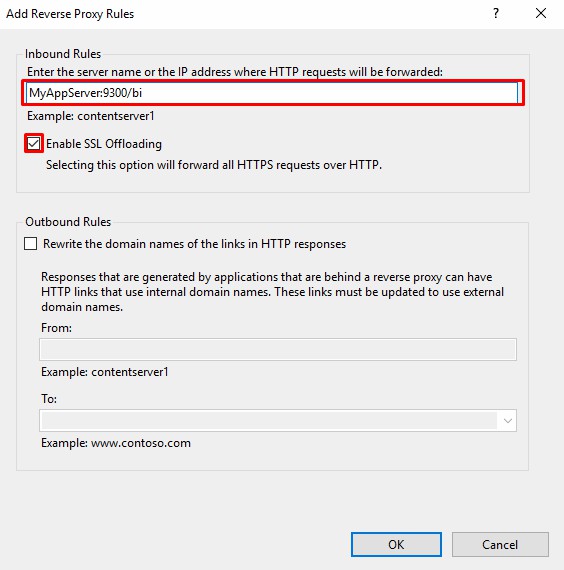
6. Under the “Inbound Rules” section you should see a text box. Enter the :/ of your application tier. Make sure “Enable SSL Offloading” is checked and click OK.
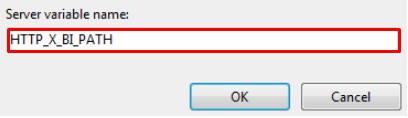
7. You should now see a new entry created under the “Inbound rules” section of the “URL Rewrite” page. You will need to do some more work on it, but not until you get to step 9. On the right hand panel, click on “View Server Variables…”. Click “Add” and type in the following variable: HTTP_X_BI_PATH. Note: The value of this variable is absolute and cannot be in any other format.
8. Click “Back to Rules” located on the right panel to exit this segment.
9. Highlight the Inbound Reverse Proxy Item that you created in step 6, and then on the right hand panel click on “Edit” located under “Inbound Rules.”
10. Scroll down until you see the “Server Variables” section and expand it. Then click on the “Add” button.
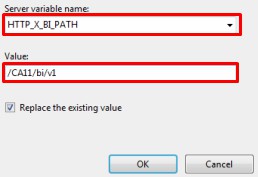
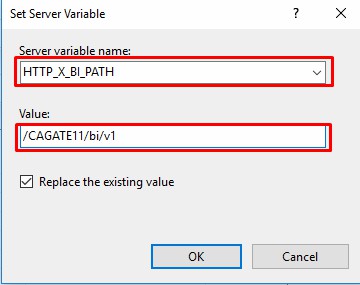
11. On the new dialog, select the HTTP_X_BI_PATH under the “Server variable name” drop down menu. Under “Value” use the name that you chose in step 2 and enter it in the following format: /”NAME from step 2″/bi/v1. So for me this would look like /CA11/bi/v1. Click the “OK” button and then click “Apply” under the “Actions” section. Click “Back to Rules.”
12. Now you are done with setting up the reverse proxy. All you need to do is to restart IIS by the upper most node of the left hand tree and click “Restart” under “Actions” in the right hand panel.
13. To test the configuration, open up a browser session and enter the following: http://” web_server”:”port”/alias/bi/
Please note that the trailing “/” after bi is important and needs to be there. If things are setup successfully then you should now be able to see your Cognos Analytics login screen.
Method 2: IIS and ARR with Cognos Analytics Server gateway (Proper Method for SSO)
In this method, you will first install IBM Cognos Analytics as an “Optional Gateway” using the IBM Cognos Analytics Server installer, and then use that to configure your reverse proxy.
1. Launch the Cognos installer executable. The one that I have looks like this: ca_srv_win64_11.0.3.xxxxxxx.exe. This will launch the IBM Cognos Analytics installer.
2. Select a language and click “Next.” Then select “I accept …” in the next window and click “Next” if you are good with the license agreement.
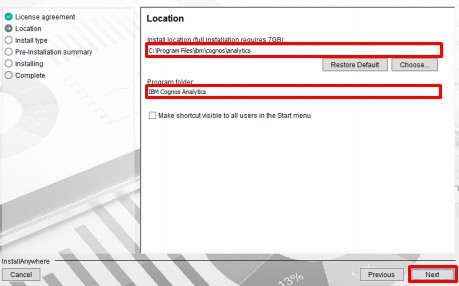
3. In the next window select an install location for your Optional Gateway, give your folder a name, and click “Next.”
4. In the “Installation type” section select the “Custom” radio button and click next.
5. In the “Custom Install” section select the “First Install” radio button and click next.
6. In the “Choose components” section check “Optional gateway” check box and click next.
7. In the next section verify everything is okay and click on “Install.”
8. Here Cognos Analytics will install and when it’s finished click on “Done.” Now that you have your Cognos Analytics installed, configure it with IIS to serve as a reverse proxy.
9. Open the Internet Information Services (IIS) Manager.
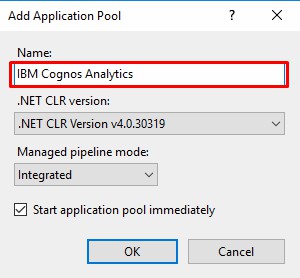
10. Expand the uppermost node on the left hand tree and right click on the “Application Pools” node and select “Add Application Pool…”
11. In the “Name” text box enter any name. I followed IBM and entered mine as “IBM Cognos Analytics”. Leave the “.Net CLR version” and the “Managed pipeline mode” as is and click OK.
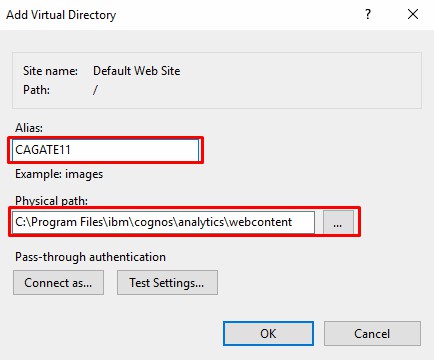
12. Expand the tree on the left hand side of the IIS Manager and right click on your website located under the “Sites” node. I didn’t have a website setup on my machine so I just selected “Default Web Site.” In the right click menu select “Add Virtual Directory…”

13. Under Alias, enter any name. I followed IBM and entered CAGATE11. Then click on the ellipses under the “Physical path” and navigate to the webcontent folder of your Cognos Analytics installation location. Click OK.
14. Expand your website node in the left hand tree (the Default Web Site in my case) and you should now see a new folder with the Alias you selected in the previous step. Expand it and highlight the “bi” folder.
15. Double-click the “URL Rewrite” icon in the center panel. This should take you to the “URL Rewrite” panel. Click on “Add Rule(s)…” in the right panel and double-click on “Reverse proxy.”
16. Under the “Inbound Rules” section you should see a text box. Enter the following: “APP_SERVER_HOST”:”PORT”/bi. Make sure “Enable SSL Offloading” is checked and click OK.
17. On the right panel click on “View Server Variables”. Click Add and type the following name: HTTP_X_BI_PATH. Note: This variable name cannot be in any other format. Type it in as you see above and click OK.
18. Click “Back to Rules” located on the right panel to exit this segment.
19. Highlight the Inbound Reverse Proxy item that you created in step 16, and then on the right hand panel click on “Edit” located under “Inbound Rules.”
20. Scroll down until you see the “Server Variables” section and expand it. Then click on the “Add” button.
21. On the new dialog, select the HTTP_X_BI_PATH under the “Server variable name” drop down menu. Under value use the name that you chose in step 13 and enter it in the following format: /”NAME from step 13″/bi/v1. So for me this would look like /CAGATE11/bi/v1. Click OK and then click “Apply” under the “Actions” section. Click “Back to Rules.”
Now you are done with setting up the reverse proxy. All you need to do is to restart IIS by the upper most node of the left hand tree and click “Restart” under “Actions” in the right hand panel.
Cognos ISAPI Setup (needed for SSO, requires method 2 above)
After the reverse proxy has been configured there is just one more step: setting up Cognos ISAPI, which is required for SSO. The steps that follow will show first how to create an IIS application for cgi-bin which maps the IBM Cognos Analytics gateway modules to the application pool that was created in method 2 above. I will then show you how to setup the internet server application programming interface using the ISAPI module through module mapping.
One important thing to note is that IBM’s documentation seems to be missing a couple of steps here that differ depending on whether you are setup on Cognos 11.0.2 or 11.0.3. But you have nothing to worry about as I will explain how to get things working for each of these Cognos Analytics versions.
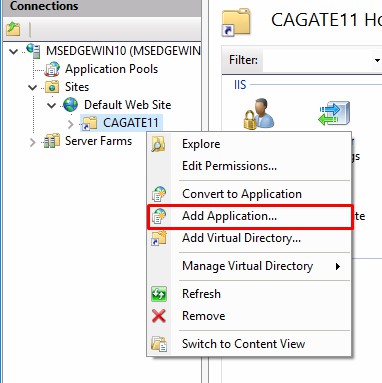
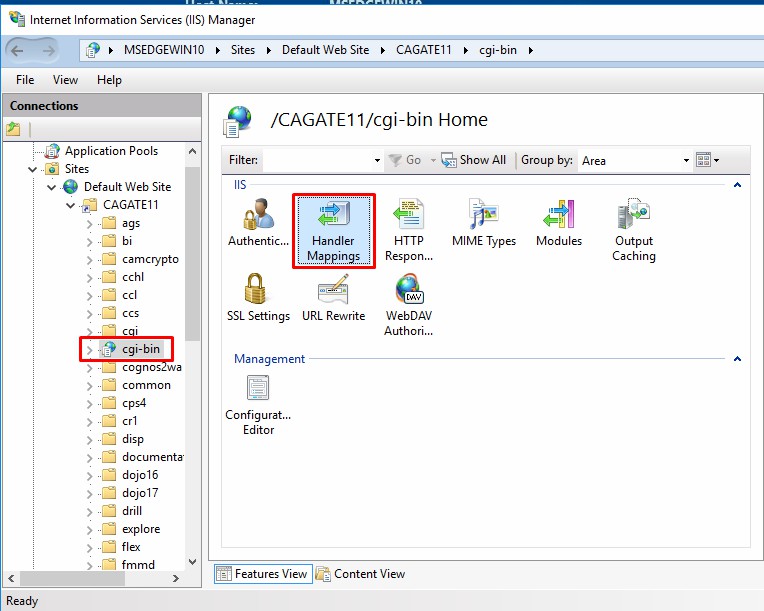
1. Back to the IIS Manager, locate the virtual directory that that you created in method 2 (remember for me it was called “CAGATE11”), right click on it and select “Add Application.”
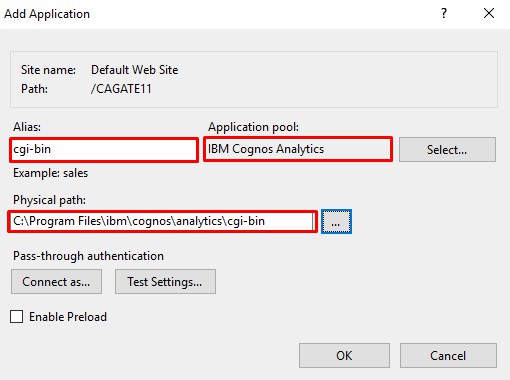
2. Fill out the fields with the following information:
1. Alias: cgi-bin
2. Application pool: Click on select and in the drop down menu select “IBM Cognos Analytics” and select OK.
3. Physical Path: Location of the cgi-bin subdirectory within your Cognos Analytics gateway install. Click OK.
3. Expand the navigation tree and highlight the cgi-bin node located under your virtual directory. Then in the center panel double-click on “Handler Mappings.”
4. Click on “Add Module Mapping…” on the right hand panel and provide the following information:
1. Request path: cognosisapi.dll (Note: this value must be exactly as what I’m showing here)
2. Module: Select IsapiModule from drop down. (Note: If you are not able to locate this value refer to Appendix A of this guide)
3. Executable: specify the path to your cognosisapi.dll. This file is located under /cgi-bin
4. Name: Give it any name. I again followed IBM and gave mine “IBMCOGNOS-ISAPI.” Click OK.

5. A dialog will appear asking for permission to allow this new ISAPI exstention. Click Yes.
Now this is where IBM’s documentation leaves out a few things. If you try to launch the following URL, you might be greeted with an error: http(s)://://cgi-bin/cognosIsapi.dll?b_action=xts.run&m=portal/main.xts&m_redirect=//bi/
In order to solve this issue you will need to follow these steps:
IBM Cognos Analytics 11.0.2
1. Launch IBM Cognos Configuration.
2. Click on the Environment node on the left hand panel.
3. Locate “Dispatcher URIs for gateway” and give it the following value of your dispatcher server: http://”appserver_host”:”port”/p2pd/servlet/dispatch/ext
4. On the IBM Cognos Configuration window click “Save” and you are done. (Note: do not click on the green “Run” button on top of the configuration window as this will not be applicable to our Optional Gateway setup.)
5. Restart IIS and test the URL above once more and if everything works then you should be greeted with the Analytics login screen.
IBM Cognos Analytics 11.0.3
1. Launch IBM Cognos Configuration.
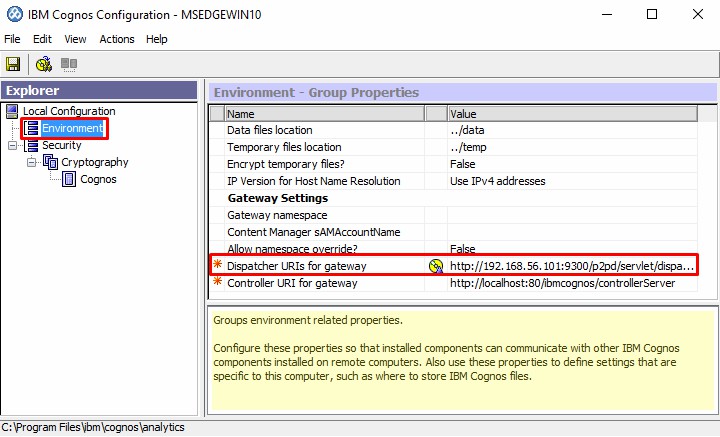
2. Click on the Environment node on the left hand panel.
3. Locate “Dispatcher URIs for gateway” and give it the following value of your dispatcher server: http://”appserver_host”:”port”/p2pd/servlet/dispatch/ext
4. Then locate “Configuration Server” and click on the pencil to edit it.
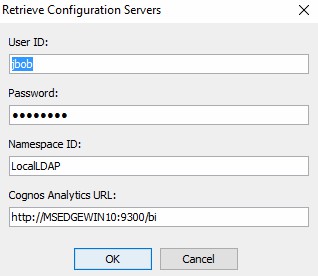
5. In the new window click on the “Retrieve” button.
6. Provide the authentication information to your Content Manager server, and click OK.
- Click OK again to save the new Configuration Server value.
- On the IBM Cognos Configuration window click “Save” and you are done. (Note: do not click on the green “Run” button on top of the configuration window as this will not be applicable to our Optional Gateway setup.)
- Restart IIS and test the URL above once more and if everything works then you should be greeted with the Analytics login screen.
Conclusion
In this guide I covered how to setup an Optional Gateway in Cognos Analytics 11.0.2 and 11.0.3. For that I showed you how to setup a reverse proxy using one of two methods and then showed you how to set up Cognos ISAPI which is required for SSO. I hope you have enjoyed this tutorial! Please leave any questions in the comments section below this blog post.
Appendix A
If you are not able to see the ISAPI Module in the “Add Module Mapping” step above, then you need to add it manually. Follow the steps below to do that:
- Launch Programs and Features in windows.
- Click on “Turn Windows features on or off.”
- Drill down to Internet Information Services > World Wide Web Services > Application and Development Features. And check the following options: ISAPI Extensions, and ISAPI Filters.
- Click OK.
- Restart IIS.
- Check and verify that ISAPI Module is now an option in the Add Module Mapping window.